ToolTag: What is it and what can I do with it?

What is a ToolTag anyway?

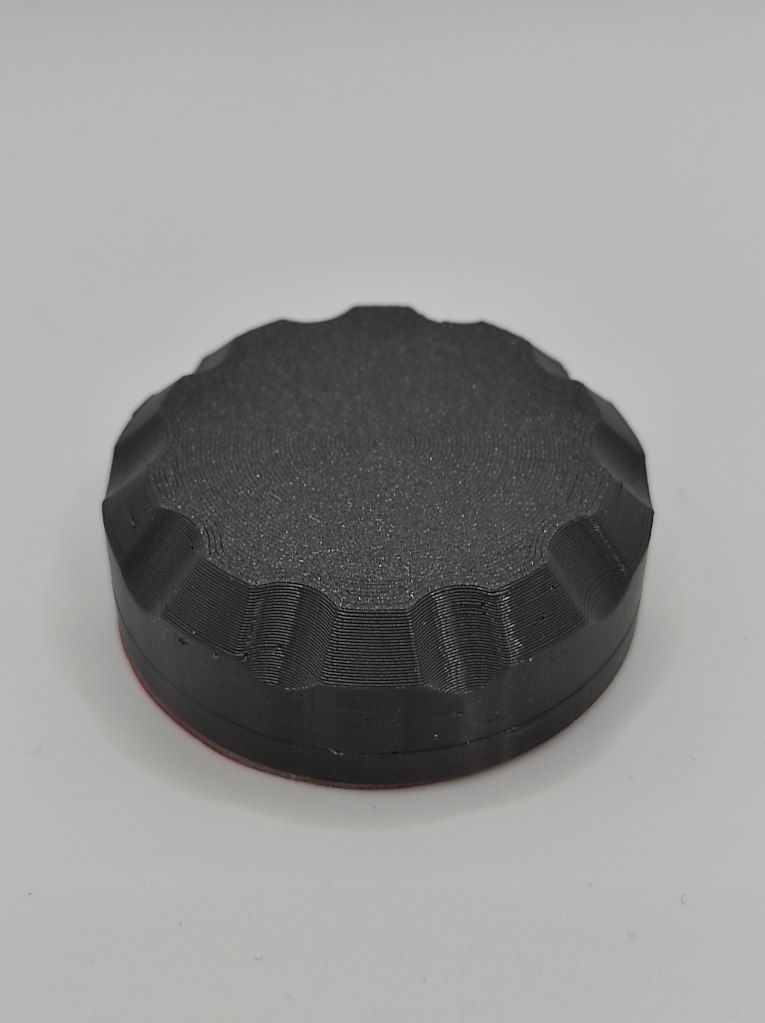
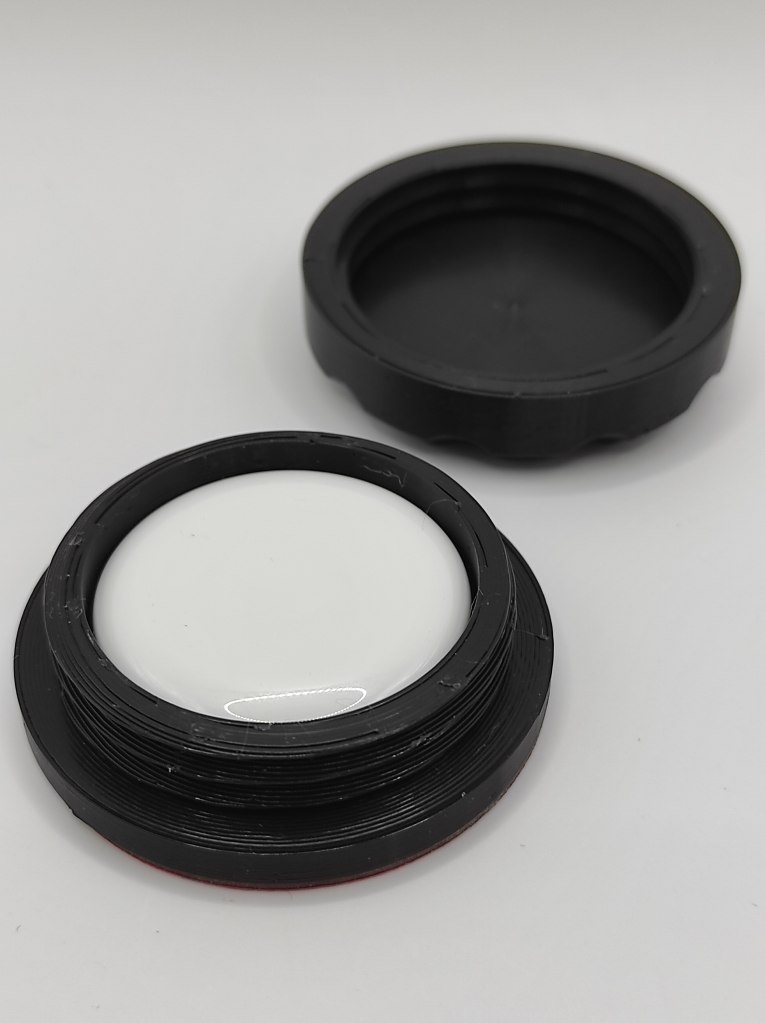
ToolTag is a 3D printed holder for an Apple AirTag. Airtags are used to track personal items using the Apple Find My Phone network. This uses Bluetooth to ping it’s location via any iPhone that is close enough to detect it, meaning even if your phone is out of Bluetooth range, you will still get location updates whenever someone’s phone connects to it. Clever stuff!

ToolTag is here to help keep your AirTag safe, secure and hidden as it’s very inconspicuous. It was designed by Imprint3D NZ and is also made by us using 3D printing technology.

Why do I need one?

Many of us are on the move a lot and keeping track of our belongings is important. Be it work gear, tools, suitcases or expensive hobby equipment, losing those items can be a pain and can cause plenty of stress. By having a way to track your belongings it helps give you a little piece of mind knowing where it is or more importantly if it’s heading somewhere it shouldn’t be!

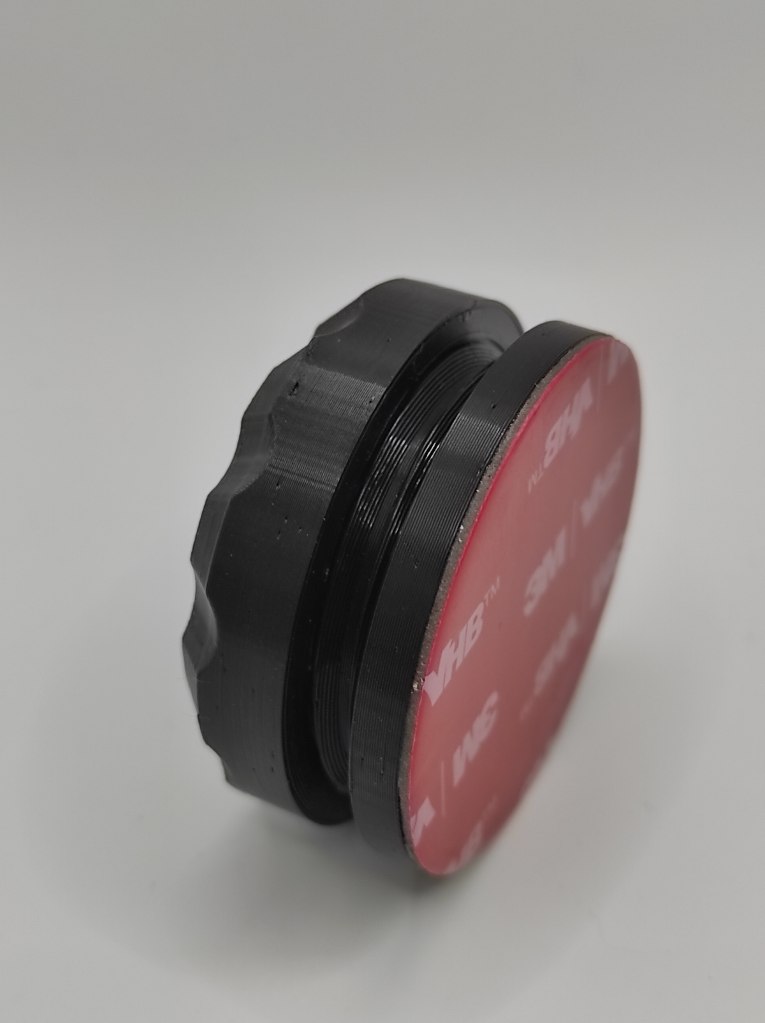
The ToolTag is a great way to attach an Airtag to your gear. It has a VHB (Very High Bond) foam pad on the back which holds the ToolTag firmly in place.

What kind of things can I use a ToolTag on?

ToolTag is very versatile and the only requirement is a smooth flat surface that is 50mm in diameter. This means you can attach it to any number of things. Many practical uses could be but not limited to:

  • Power tools/Tool Boxes
  • Sporting equipment
  • Car/Truck
  • Boats/Jetski
  • Camera equipment
  • Caravan/Campervan
  • Luggage/Suitcase

ToolTag is designed to blend in with it’s surroundings. By blending in it and not drawing attention to itself, in the unfortunate even your item is stolen, it is most likely a thief would not know that there is an Airtag tracking it. This gives you a bit more of a chance to be able to track and locate your belongings.

Who was the ToolTag designed for?

My original idea was to develop a small, inexpensive way to attach a tracker to tools for Trades people. After talking with some friends who are in the trades and realising how much expensive gear they have and the countless stories of things being stolen I thought I could try and come up with something to help out. While Tradies were my original thought for who might benefit from this I quickly realised there were other work forces who would also benefit. Flight and cabin crew then came to mind as their case is their life while on the go and being able to keep tabs on it is super handy.

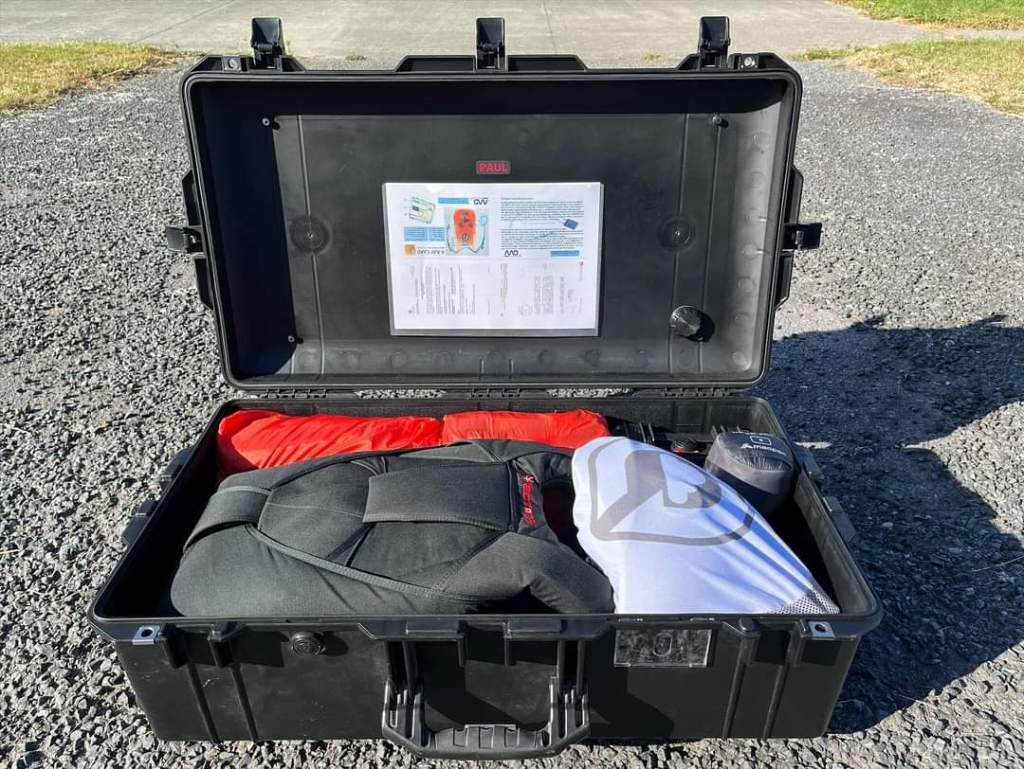
Since it was designed the ToolTag has also been used to attach to trucks, boats, camera equipment, skydiving equipment hard cases and a list that goes on and on. It really is something that can be used by anyone for their particular needs. Got an awesome idea on how you could use a ToolTag? Be sure to message us and let us know!


Thank you for taking the time to read the blog post on the ToolTag, we really appreciate it and if you have any questions feel free to contact us or if you are ready to order yours today then you can visit our ToolTag page place your order.
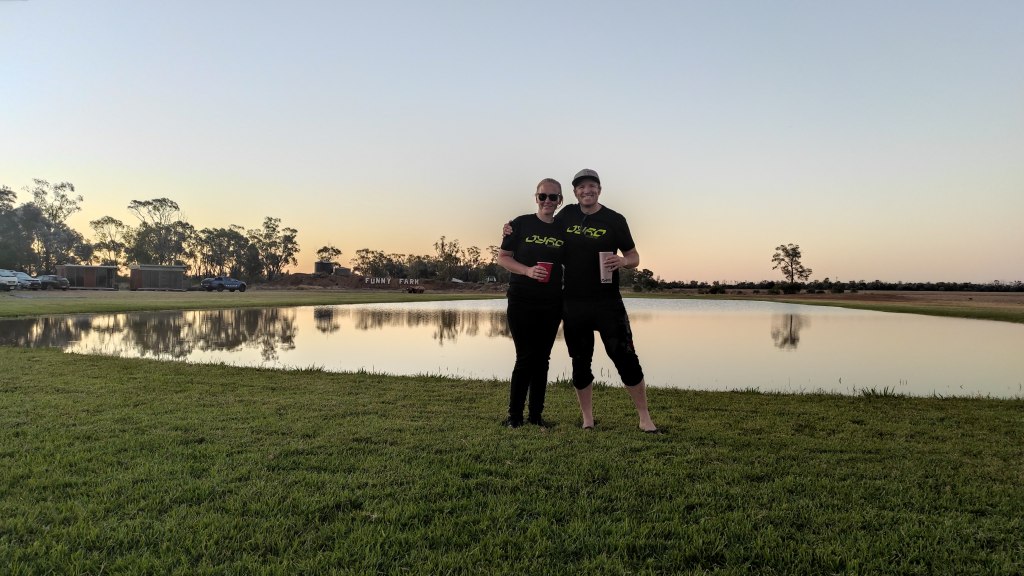
Chris Snell

Founder of Imprint3D NZ

Illuminating the Past: A Fascinating Journey Through the History of Lithophanes

Welcome to our blog, where we explore the history of lithophanes – an ancient art form that continues to captivate us with its exquisite play of light and shadow. Join us as we unravel the rich tapestry of history woven into these delicate, luminous creations.

Origins in the East:

Our journey begins in 18th-century China, where skilled artisans carved intricate scenes onto thin porcelain shells. When illuminated from behind, these carvings revealed stunning images, captivating viewers with their ethereal glow. This ancient practice, rooted in the East, laid the foundation for the mesmerizing world of lithophanes.

European Renaissance:

As trade routes expanded, lithophanes found their way to Europe during the Renaissance. In the 19th century, Europe became the epicenter of lithophane production. Craftsmen in France and Germany embraced this art, creating delicate porcelain panels that adorned the interiors of homes and public spaces. These panels, often depicting scenes from nature, folklore, and mythology, added a touch of magic to European art and décor.

Victorian Elegance:

During the Victorian era, lithophanes reached the peak of their popularity. These exquisite artworks became fashionable ornaments, adorning everything from lampshades to teacups. The Victorians cherished lithophanes for their ability to evoke emotions through softly illuminated scenes, capturing the hearts of art enthusiasts worldwide.

Revival in the Modern Era:

In recent decades, lithophanes have experienced a bit of a come back, thanks to advancements in 3D printing technology. Today, at Imprint3D NZ, we create custom lithophanes, preserving the tradition while infusing it with modern creativity. This revival allows individuals to transform cherished memories into tangible, illuminated art pieces, breathing new life into this ancient practice.

Imprint3D NZ: Bridging Tradition and Innovation:

At Imprint3D NZ, we honor the legacy of lithophanes by crafting personalized creations that capture the essence of this time-honored art form. Using cutting-edge 3D printing techniques, we bring your memories to life, transforming them into enchanting lithophanes that illuminate your space with a warm, nostalgic glow.

Modern day 3D printed Lithophane

Preserving Heritage, One Lithophane at a Time:

As we conclude our journey through the history of lithophanes, we invite you to explore this enchanting art form. At Imprint3D NZ, we celebrate the heritage of lithophanes by crafting bespoke creations that merge tradition with innovation. Whether it’s a cherished family portrait or a beloved landscape, our lithophanes capture the beauty of your memories, preserving them for generations to come.

To learn more about our custom-made Lithophanes and how to order your own, click the button below.

Thank you for joining us on this enlightening voyage through the ages. Stay tuned for more intriguing explorations into the world of art, history, and technology, right here on the Imprint3D NZ blog.

Revolutionising Falconry and rehabilitation: 3D Printing in harmony with nature

Falconry stands as one of the oldest forms of hunting known to mankind, with its roots tracing back thousands of years. It embodies a symbiotic relationship between humans and birds, characterised by mutual benefits. The avian partner finds safety and security from predators and diseases, while humans gain a reliable source of freshly caught food. Even in contemporary times, falconry continues to be practised by thousands, not only for recreational purposes but also for pest control and educational pursuits. These majestic birds have consistently captivated our imaginations.

While the fundamental principles of training have endured, advancements in technology have allowed us to refine our methods and leverage more sophisticated tools. A notable technological addition in recent times is the incorporation of 3D printing, an unlikely union given the historical context and considering even King Henry VIII once engaged in falconry. The application of 3D printing has proven instrumental in adopting modern equipment, such as GPS telemetry, enabling us to monitor the birds’ movements closely. From a rehabilitation perspective, this technology has been a game-changer. Additionally, it facilitates the collection of crucial data essential for a comprehensive understanding of these birds’ day-to-day lives.

Two 3D printed objects still attached to the 3D print bed after it has finished printing.
Two GPS trackers clipped to a 3D printed mount for tracking raptors during rehabilitation.

In collaboration with Imprint3D NZ, we have designed improved “tail mounts & backpacks.” These innovations not only simplify the attachment and removal of GPS telemetry but also allow for the addition of accessories like tail guards for protecting fragile feathers and cameras for capturing live footage. This development has become an indispensable component of our daily falconry toolkit. Engineering these mounts presents challenges due to the intricate requirements involved. Fortunately, our collaboration with experienced engineers has not only refined the mounts themselves but has also involved experimentation with the best available materials.

These backpacks are held on using a very soft Teflon ribbon and is non invasive. They are designed to lightweight so it does not impair the bird in any way.

Falconry equipment for sale in today’s market can be limited so having the opportunity to develop exactly what we need. Imprint3D NZ also helps by providing a unique opportunity to not only customize but also actively participate in the design process. Our collaboration with them has resulted in a revolutionary approach to acquiring falconry gear.

Written by Chris Brook, Co-founder of Kahu Conservation, New Zealand

Interested in learning more about what Kahu Conservation is up to? You can find them using the following links:

www.kahuconservation.com

www.instagram.com/kahu.conservation

www.facebook.com/kahu.conservation


Looking for a custom make solution for your next project? Get in touch with us to see how we can you.

Choosing the Perfect Portrait for your 3D printed Lithophane: A Step-by-Step Guide

When it comes to creating a stunning and lifelike Lithophane, the choice of the right photograph is crucial. A Lithophane, after all, is all about capturing the essence of a moment or a person in intricate detail. In this step-by-step guide, we will walk you through the process of selecting the ideal portrait photo for your 3D printed masterpiece.

Step 1: Opt for Clear and Sharp Images

Begin by selecting a high-resolution, original photo taken with a digital camera or smartphone. Avoid using screenshots or saved images from social media platforms like Facebook, as they tend to have low quality. Original photos capture details better, ensuring your Lithophane comes out beautifully detailed and sharp.

Step 2: Choose a Well-Lit Portrait

Select a photo taken in soft, natural light. Harsh shadows or overly bright sunlight can obscure details. Natural, diffused light enhances the subject’s features and adds depth to your Lithophane.

Step 3: Composition is key

A well-composed image with the subject in the foreground is best. Choose a relatively close up portrait so your subject shines. Try to avoid an image where the subject is distant or small in the composition and therefore gets lost in the background.

Step 4: Embrace Simplicity

In the background, less is more. Opt for uncluttered, simple backgrounds. A plain wall or a natural setting works best. Simplicity ensures the focus remains on the subject, making your Lithophane visually striking.

Step 5: Select Expressive and Emotive Photos

Choose a portrait that captures genuine emotions and expressions. A heartfelt smile, a thoughtful gaze, or a moment of laughter adds depth and character to your Lithophane, making it emotionally resonant. Your picture doesn’t just have to be of a person, your furry friends also make great subjects!

Step 6: Consider the Angle

Front-facing or slightly angled portraits work well to capture features. Try to avoid having harsh shadows or highlights on the face.

Step 7: Seek Expert Guidance (If uncertain)

If you’re unsure whether a photo is suitable, don’t hesitate to get in touch with Imprint3D NZ. We’re here to help. Send us your image, and we’ll assess its suitability for creating a high-quality Lithophane. We can help adjust or crop the image if it’s not quite perfect. Your satisfaction is our priority, ensuring your cherished moments are captured flawlessly.

Here’s some example of images that work well for a Lithophane and some that are not really suitable to give you guidance, but reach out if you have questions.

Good examples

Good example photo with a clear and sharp image

Clear and sharp image

Good example photo with good lighting

Good lighting; well lit overall

Good example photo with good lighting and no stark contrast

Good lighting; even with no stark contrast

Good example photo well composed with subject in the foreground

Well composed with subject in foreground

Good example photo which is well composed with subject face on or slightly angled

Well composed with subject face-on or slightly angled

Good example photo with neutral and simplistic background

Neutral simplistic background so subject stands out

Unsuitable

Poor example photo of photo which is blurry and low resolution

Blurry image or low resolution

Poor example photo with poor and dark lighting

Poor lighting; too dark

Poor example photo with poor lighting and too much contrast

Poor lighting; too much contrast

Poor example photo with subject too small and distant

Poorly composed with subject too small/distant

Poor example photo which is poorly composed with face hidden by shadow

Poorly composed with subject face hidden or dark

Poor example photo with a busy and cluttered background

Busy/cluttered background with subject lost

Follow these steps and tips to select your photo today and get started with creating the perfect Lithophane. Remember this is only a guide to helping you on your way, Imprint3D NZ is here to assist you at every step.

If you’re ready to order a Lithophane follow these steps.